
Sweet Potato Pie Cheesecake Recipe
This Sweet Potato Pie Cheesecake combines two of my favorite desserts into one! It starts with a buttery gingersnap cookie crust, followed by a layer of homemade sweet potato pie filling and a thick, creamy cheesecake layer. It's finished with fluffy maple whipped cream and crushed gingersnap cookies for a little extra crunch.
Jump to Recipe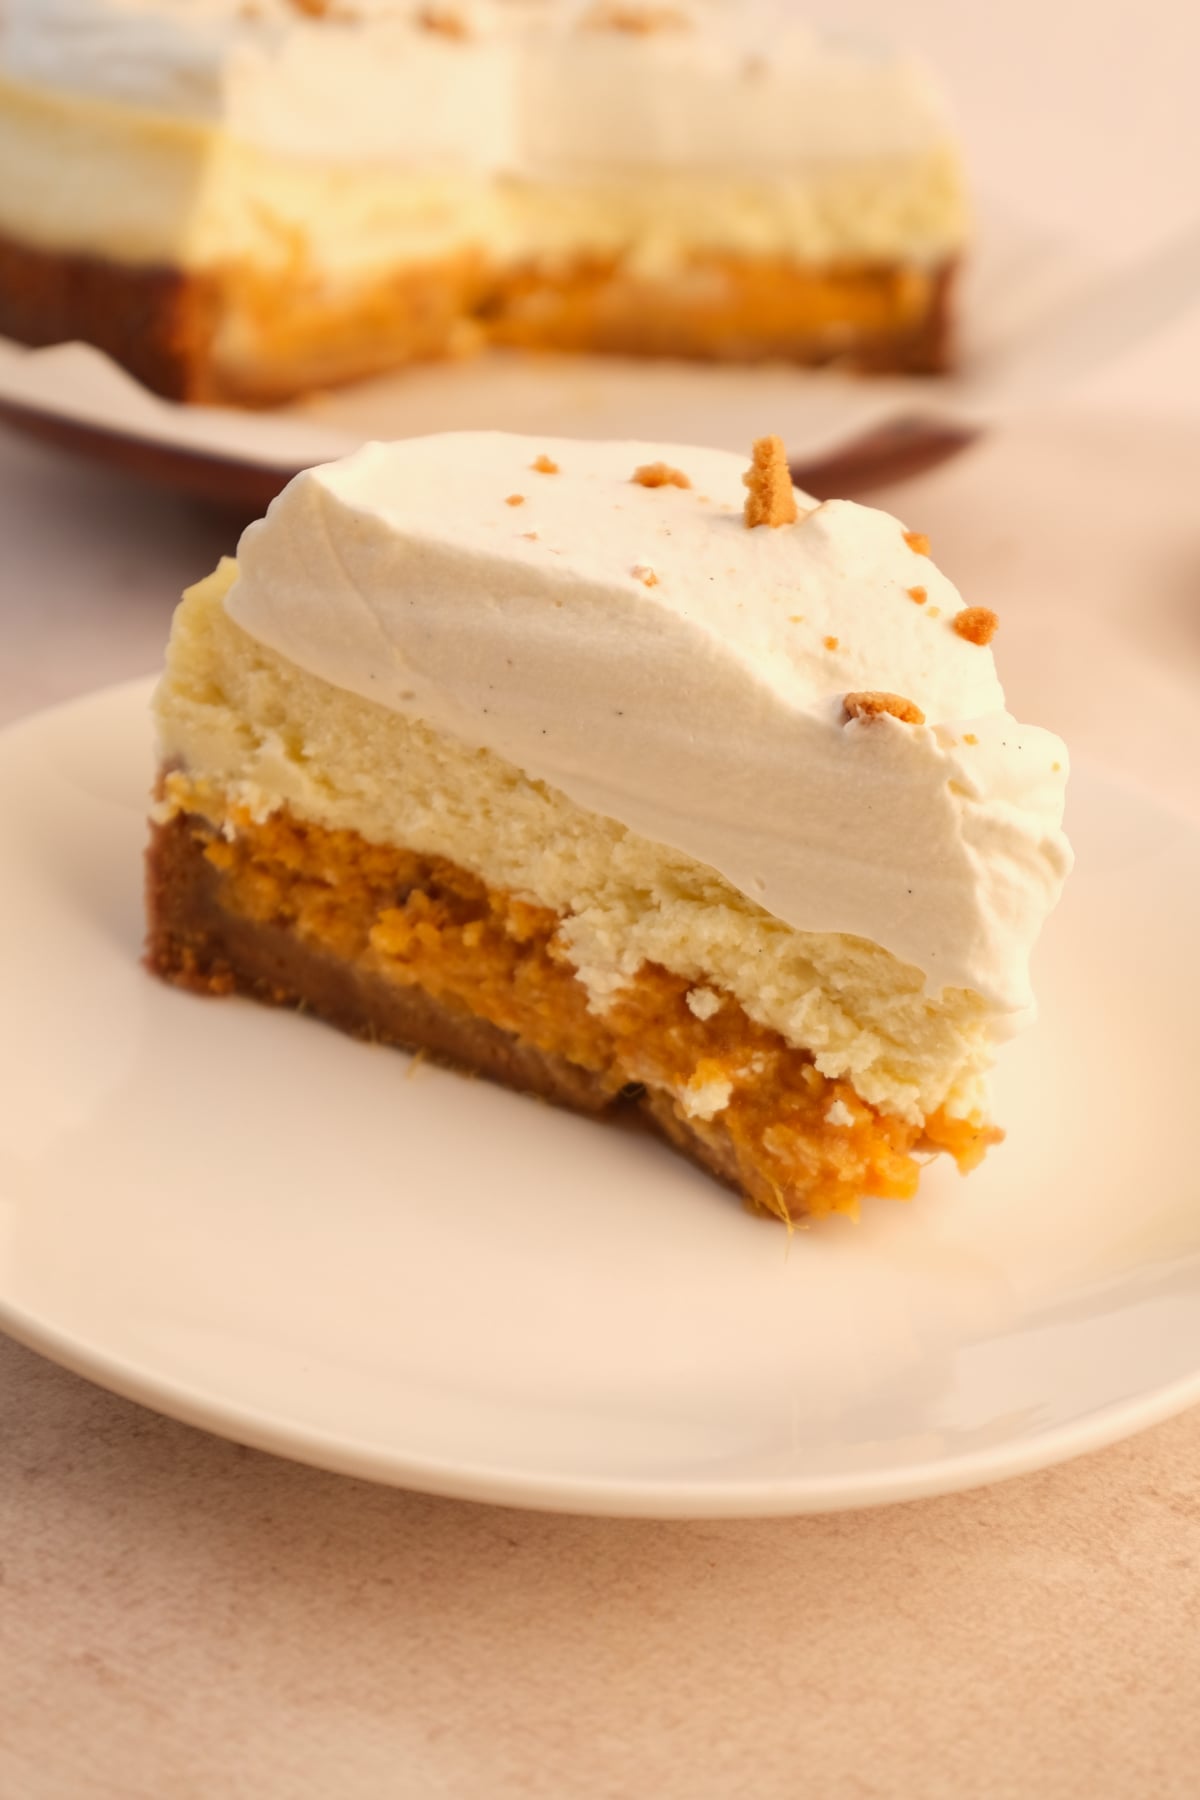
You get the warm, comforting flavors of sweet potato pie with the rich, creamy texture of cheesecake. It's the perfect dessert for Thanksgiving, Christmas, or anytime you're craving something a little different!
This recipe was actually inspired by my very first internship after culinary school. I worked at the Sweet Auburn Curb Market in Atlanta, now known as the Municipal Market. The Sweet Auburn Bakery was known for this cheesecake and their amazing nestle toll house cookies.
Sweet Potato Pie Cheesecake Ingredients and Substitutions
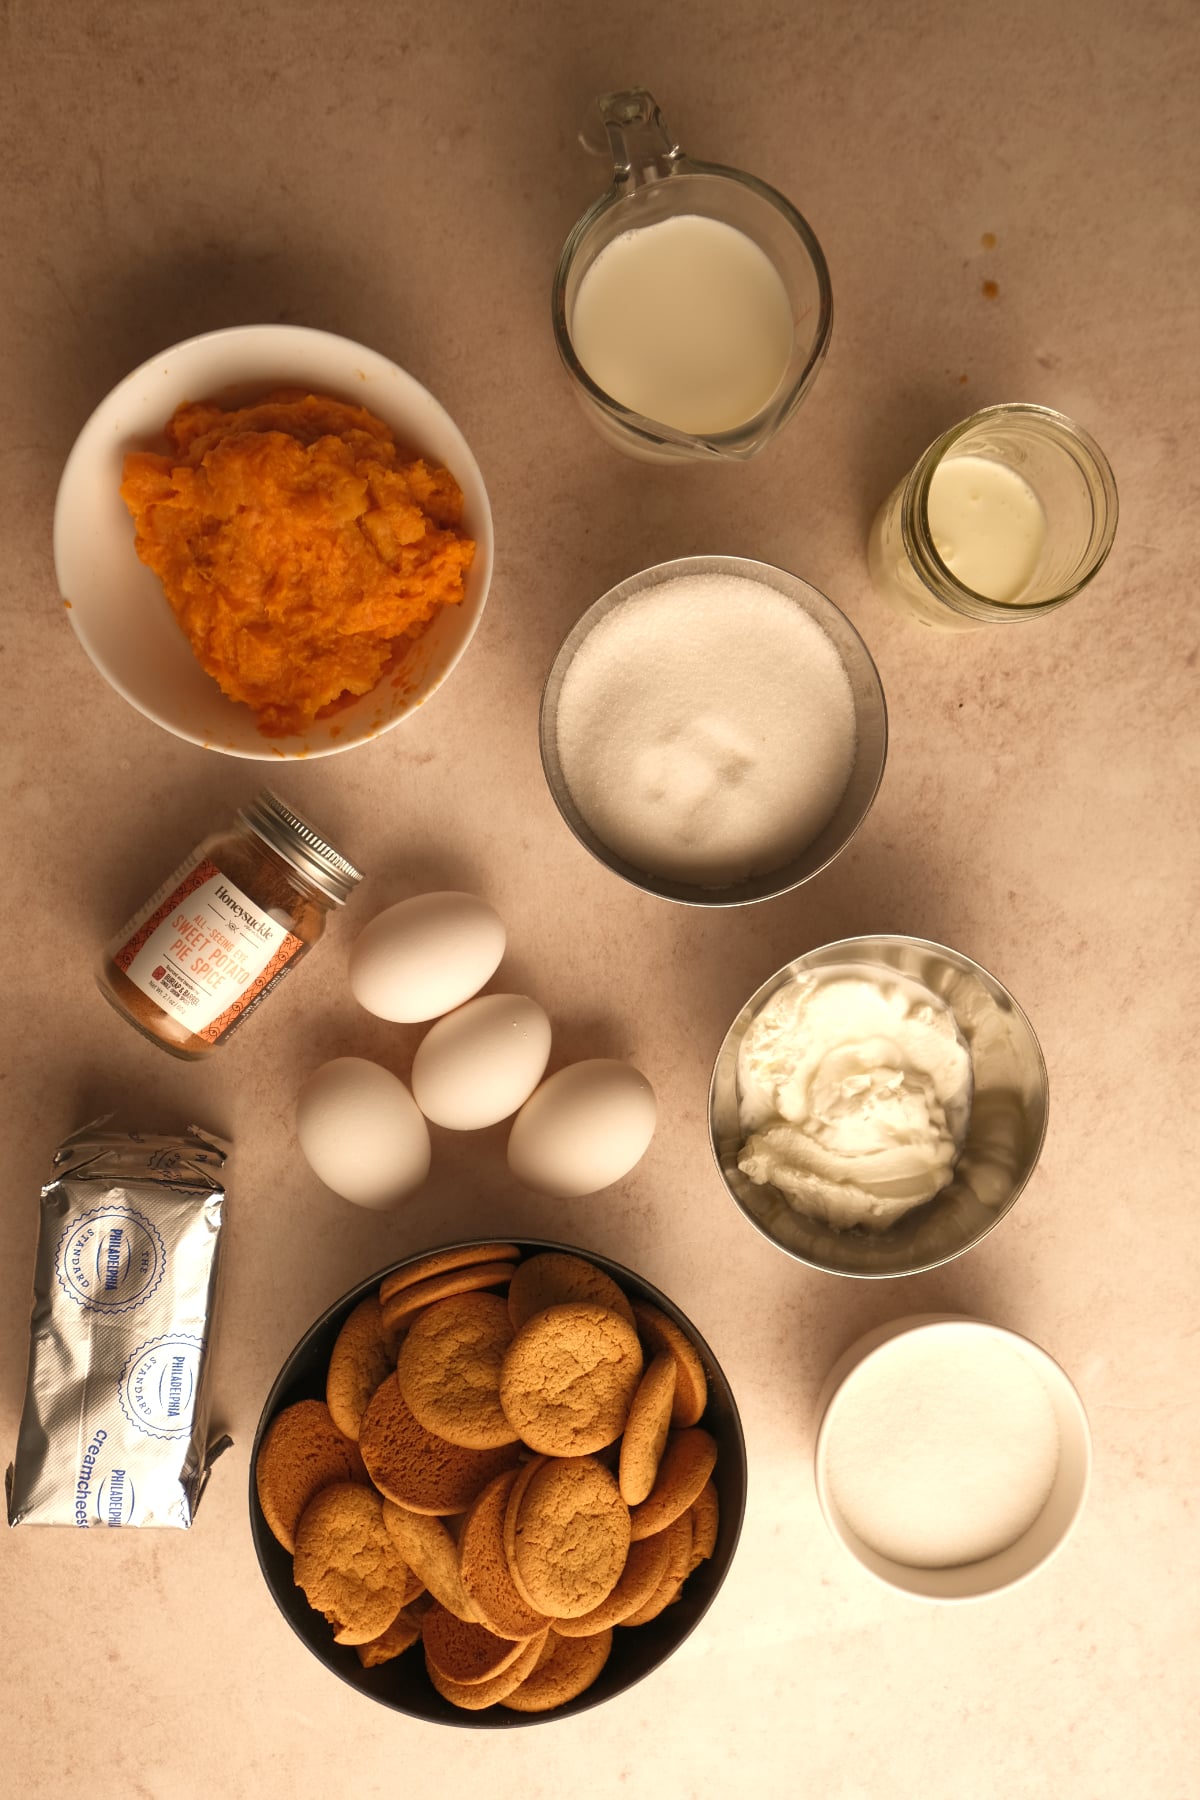
Gingersnap Cookie Crust
- Gingersnap Cookies: Crushed gingersnap cookies make the base of this cheesecake. They add a delicious ginger flavor and a little crunch. You can substitute graham crackers, but I love how the gingersnaps complement the sweet potato filling.
- Unsalted Butter: Melted butter helps bind the cookie crumbs together.
- Brown Sugar: Adds a little sweetness and helps give the crust a caramel-like flavor. But if you prefer it less sweet then just skip the brown sugar.
Sweet Potato Pie Filling
- Sweet Potatoes: You'll need cooked, mashed sweet potatoes. I prefer baking my sweet potatoes because it helps concentrate their natural sweetness without adding extra moisture.
- Granulated Sugar: Sweetens the pie filling, feel free to use brown sugar.
- Unsalted Butter: Melted butter adds richness and flavor.
- Eggs: Help the sweet potato pie filling set so it can support the cheesecake layer.
- Whole Milk: Adds moisture and creates a smooth, creamy filling. I recommend whole milk for the best texture.
- Vanilla Extract: Enhances the natural sweetness of the sweet potatoes.
- Spices: Cinnamon, Ginger, Nutmeg
Creamy Cheesecake Filling
- Cream Cheese: I highly recommend Philadelphia full-fat cream cheese. It's my favorite brand for cheesecake because it gives me a smooth, creamy batter. Make sure your cream cheese is completely at room temperature before mixing to prevent lumps.
- Granulated Sugar: Sweetens the cheesecake without overpowering the sweet potato filling.
- Sour Cream: Adds moisture and a slight tanginess that balances the richness. Full-fat plain Greek yogurt can be used as a substitute, although the texture may be slightly different.
- Heavy Cream: Helps create a smooth, creamy cheesecake.
- Eggs: Give the cheesecake structure and help it set during baking. Use room-temperature eggs so they incorporate evenly.
- Vanilla Extract: Adds flavor and complements both the cheesecake and sweet potato layers.
Maple Whipped Cream
- Heavy Whipping Cream: Use cold heavy whipping cream for the best results.
- Pure Maple Syrup: Naturally sweetens the whipped cream and adds maple flavor. Make sure you're using real maple syrup, not pancake syrup.
- Vanilla Bean Paste: Adds a delicious vanilla flavor and those beautiful little vanilla bean specks. Feel free to leave it out if you'd like.
Let's Make Sweet Potato Pie Cheesecake!
Making this cheesecake requires a little patience, but I promise it's worth it! The most important part of this recipe is allowing each layer to set properly before adding the next one.
Step 1: Prepare the Gingersnap Cookie Crust
Start by preheating your oven to 350°F.
Using a food processor, pulse your gingersnap cookies until they turn into fine crumbs.
Kid Friendly Tip: You can also place the cookies into a large zip-top bag and have your kids crush them using a rolling pin.
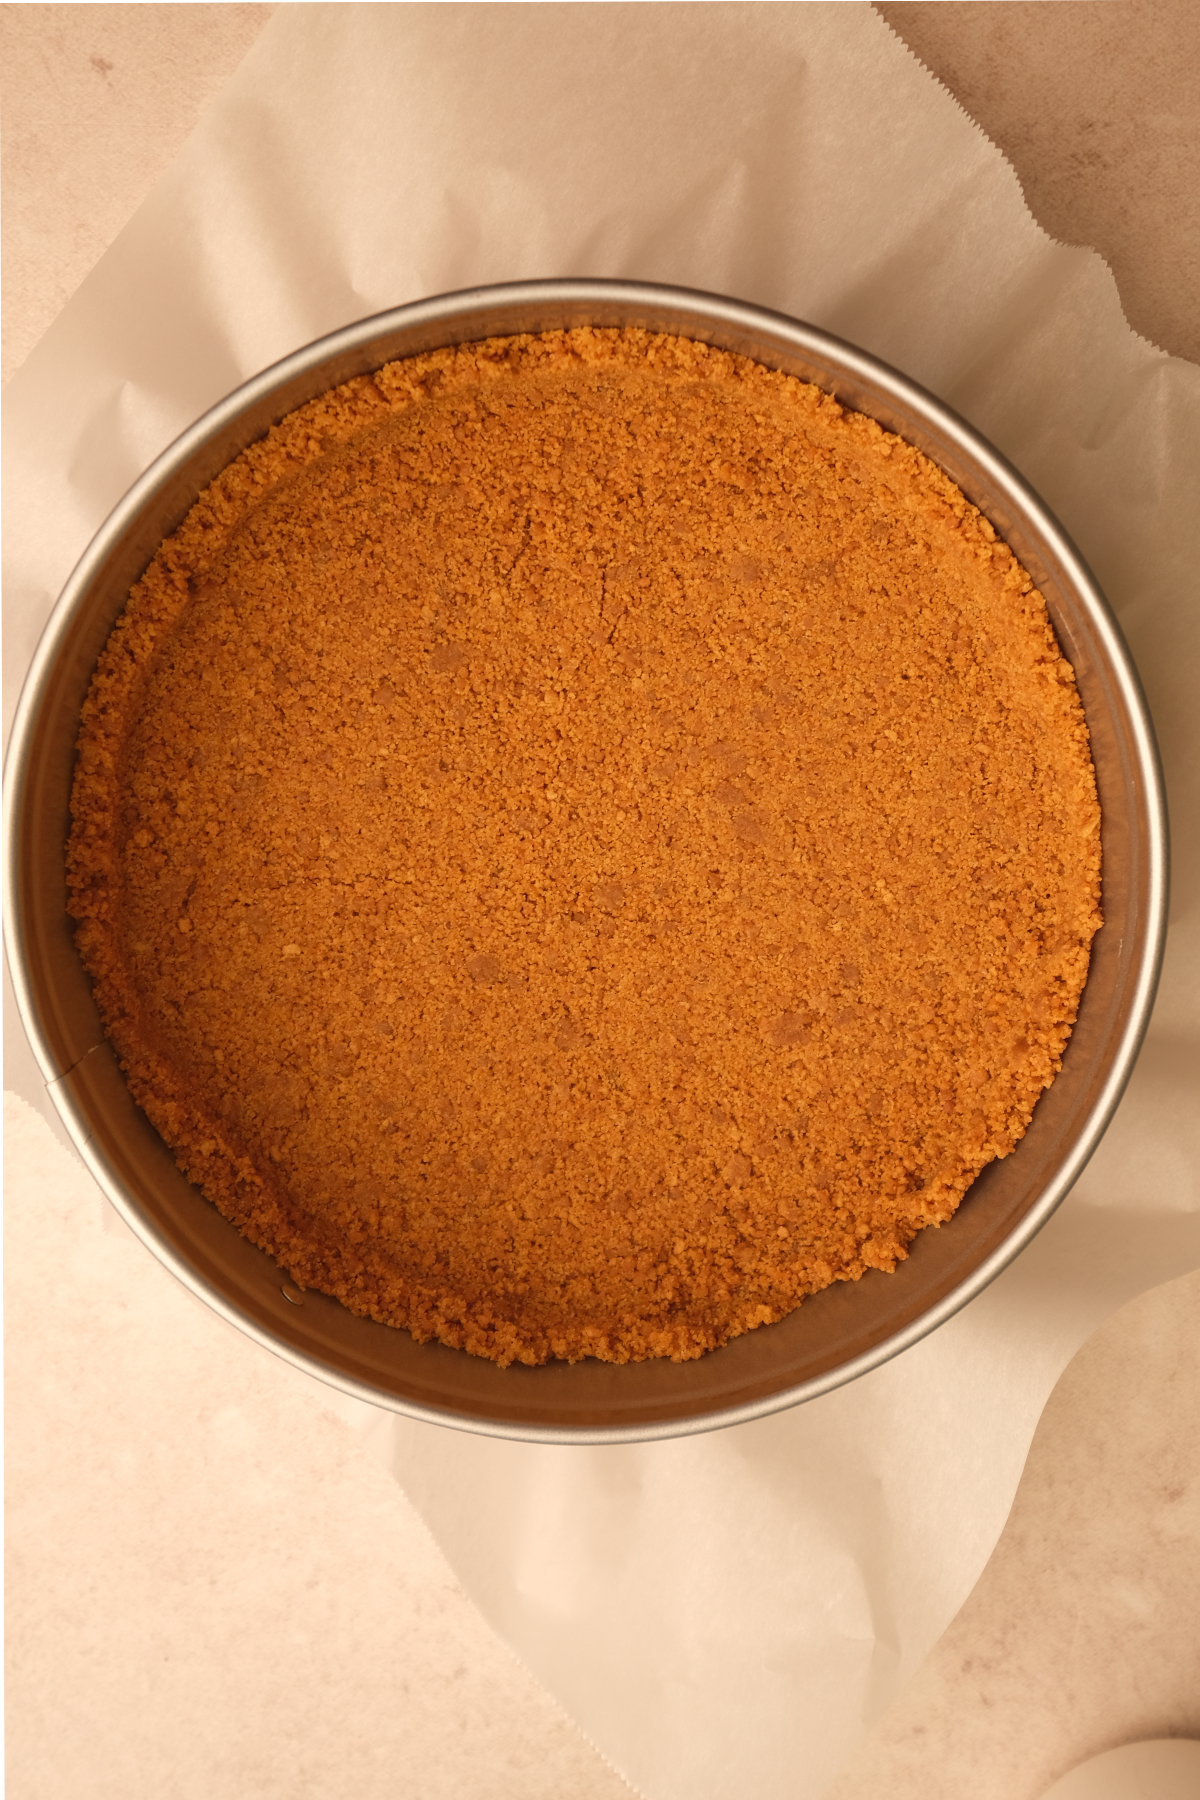
In a medium bowl, combine the crushed gingersnap cookies, melted butter, and brown sugar. Mix everything until the crumbs are evenly coated and resemble wet sand.
Line your 10-inch spring form pan with parchment paper for easier cleaning and then pour the gingersnap crumb mixture. Use the bottom of a measuring cup or a flat-bottomed glass to press the cookie crumbs firmly and evenly into the bottom of the pan.
Here's a little tip: Place your spring form pan on a baking sheet before baking. Some of the melted butter will leak through the bottom of the pan, and the baking sheet will catch it before it makes a mess in your oven.
Bake the crust at 350°F for 10 minutes. Remove it from the oven and set it aside while you prepare the sweet potato filling.
Step 2: Make the Sweet Potato Pie Filling
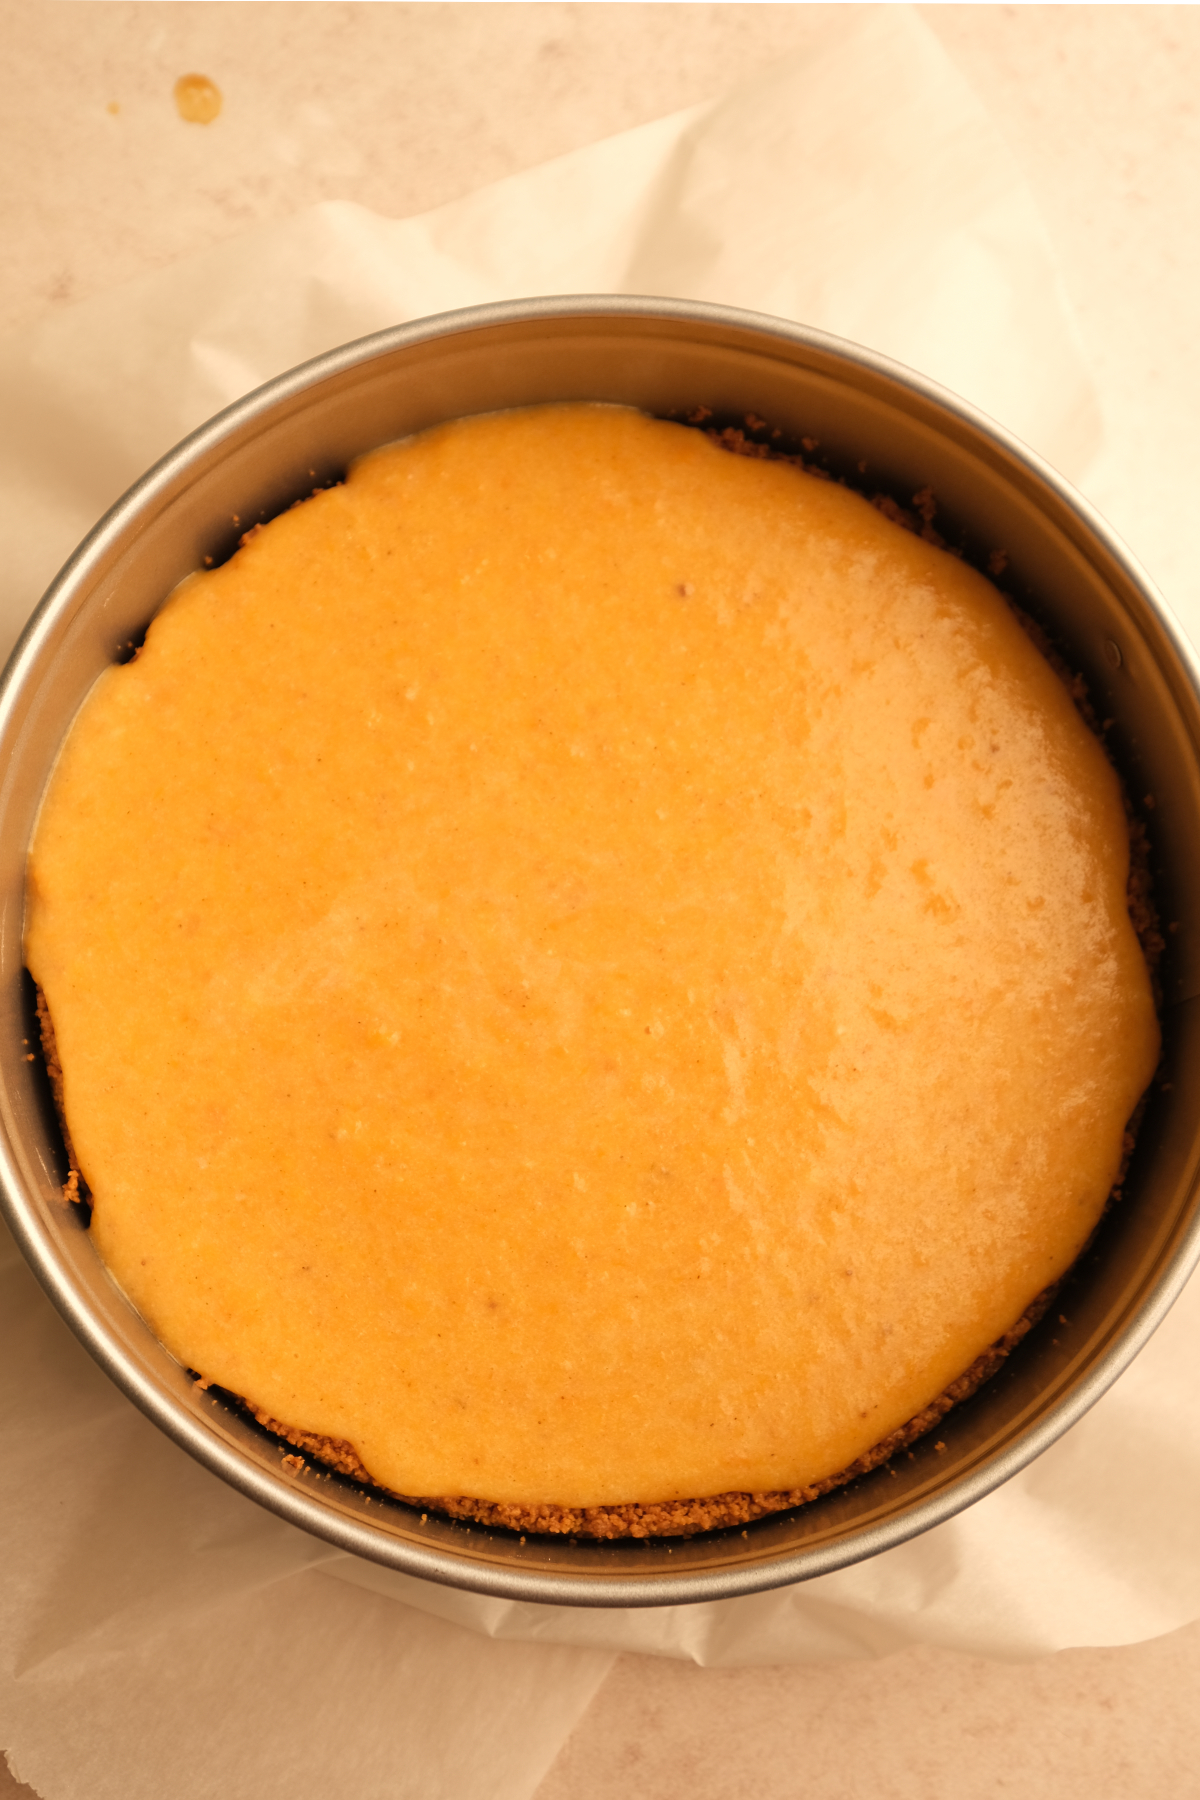
In a large mixing bowl, combine the mashed sweet potatoes, granulated sugar, spices, vanilla extract, melted butter, eggs. Once it's fully mixed add the milk.
Using a hand mixer or stand mixer fitted with the paddle attachment, mix everything until the filling is smooth and well combined. Make sure there aren't any large chunks of sweet potato remaining.
Pour the sweet potato mixture directly over your baked gingersnap crust and spread it evenly.
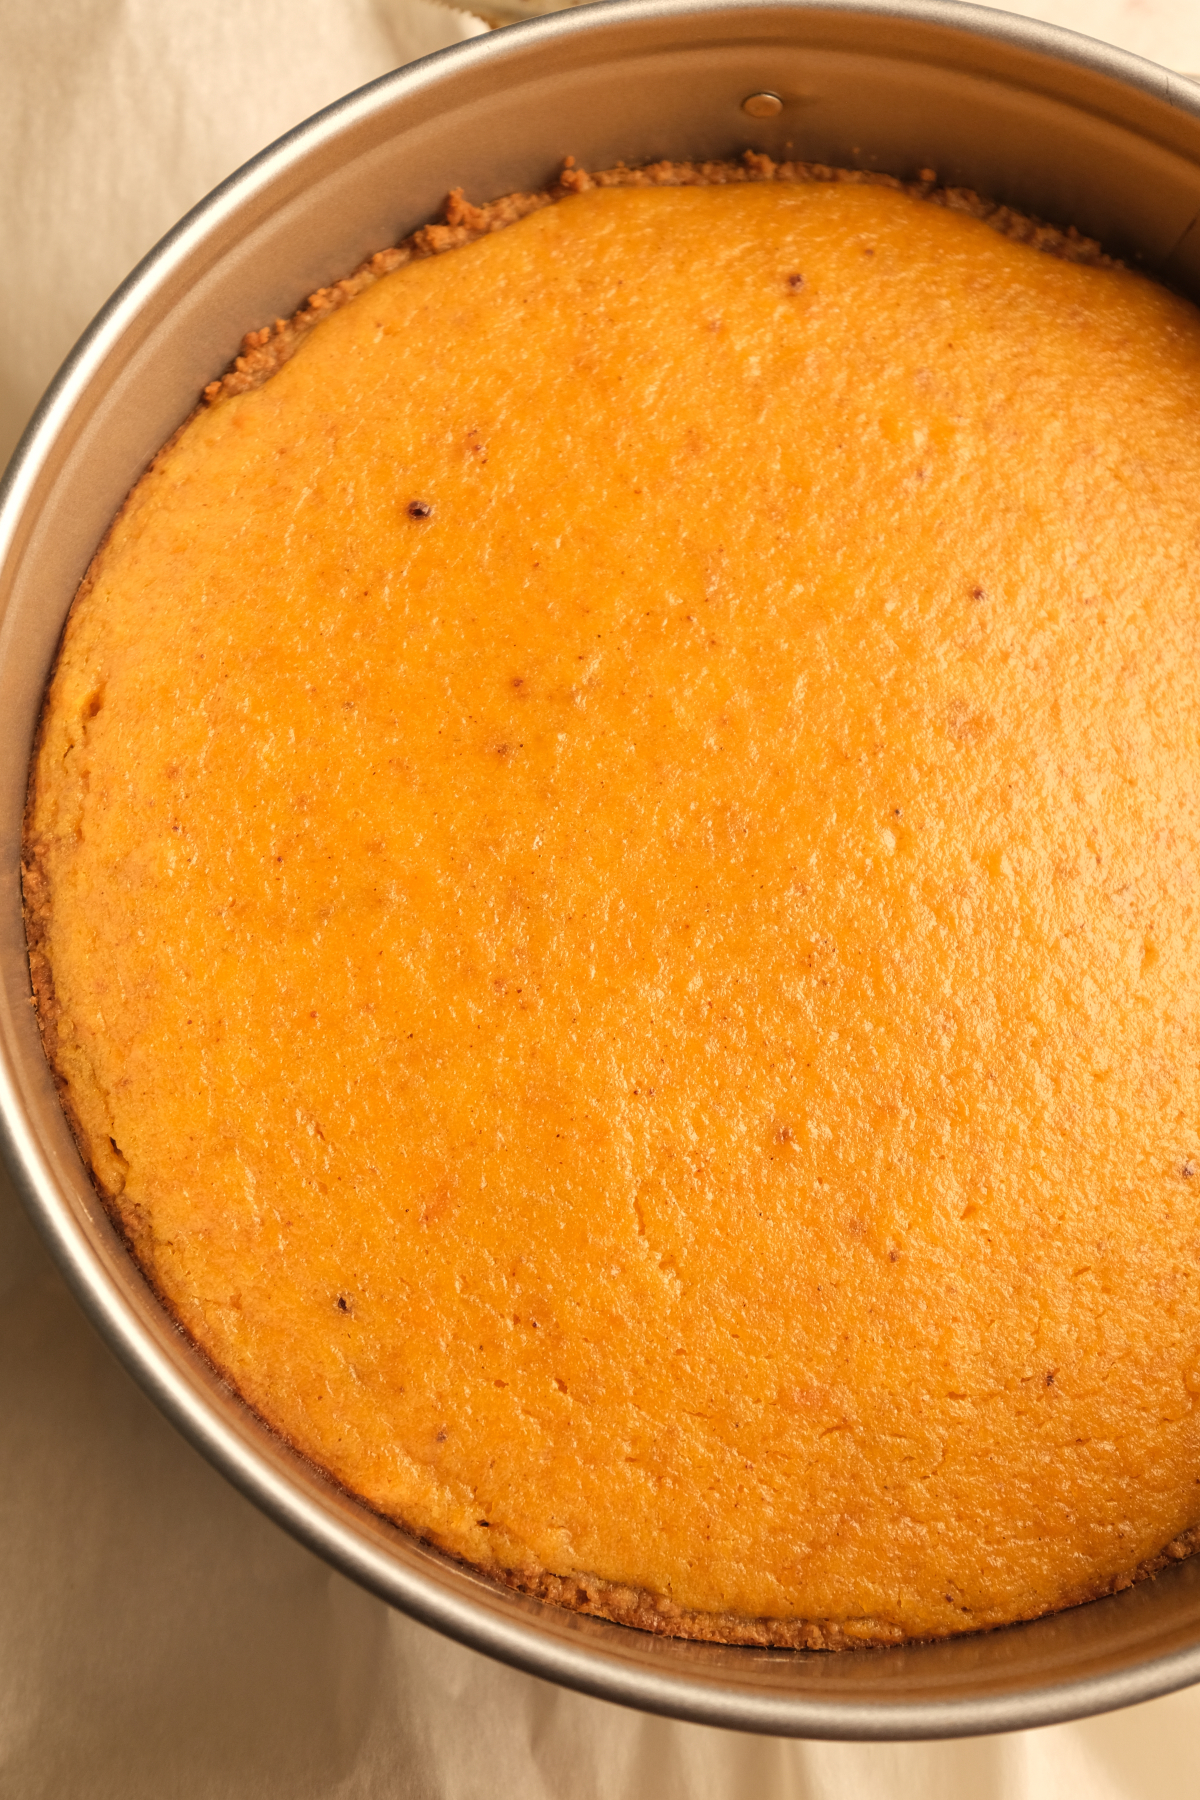
Bake at 350°F for approximately 40 minutes, or until the sweet potato filling is almost completely set, but not fully baked.
This step is important! You want your sweet potato pie layer to be almost fully baked before adding the cheesecake batter. If the sweet potato filling is still too soft or liquid, the heavier cheesecake batter can sink into it and push the sweet potato layer down.
The filling should look set around the edges with just a little movement remaining in the center. If it still looks wet or loose, give it a few more minutes in the oven.
Step 3: Make the Creamy Cheesecake Batter
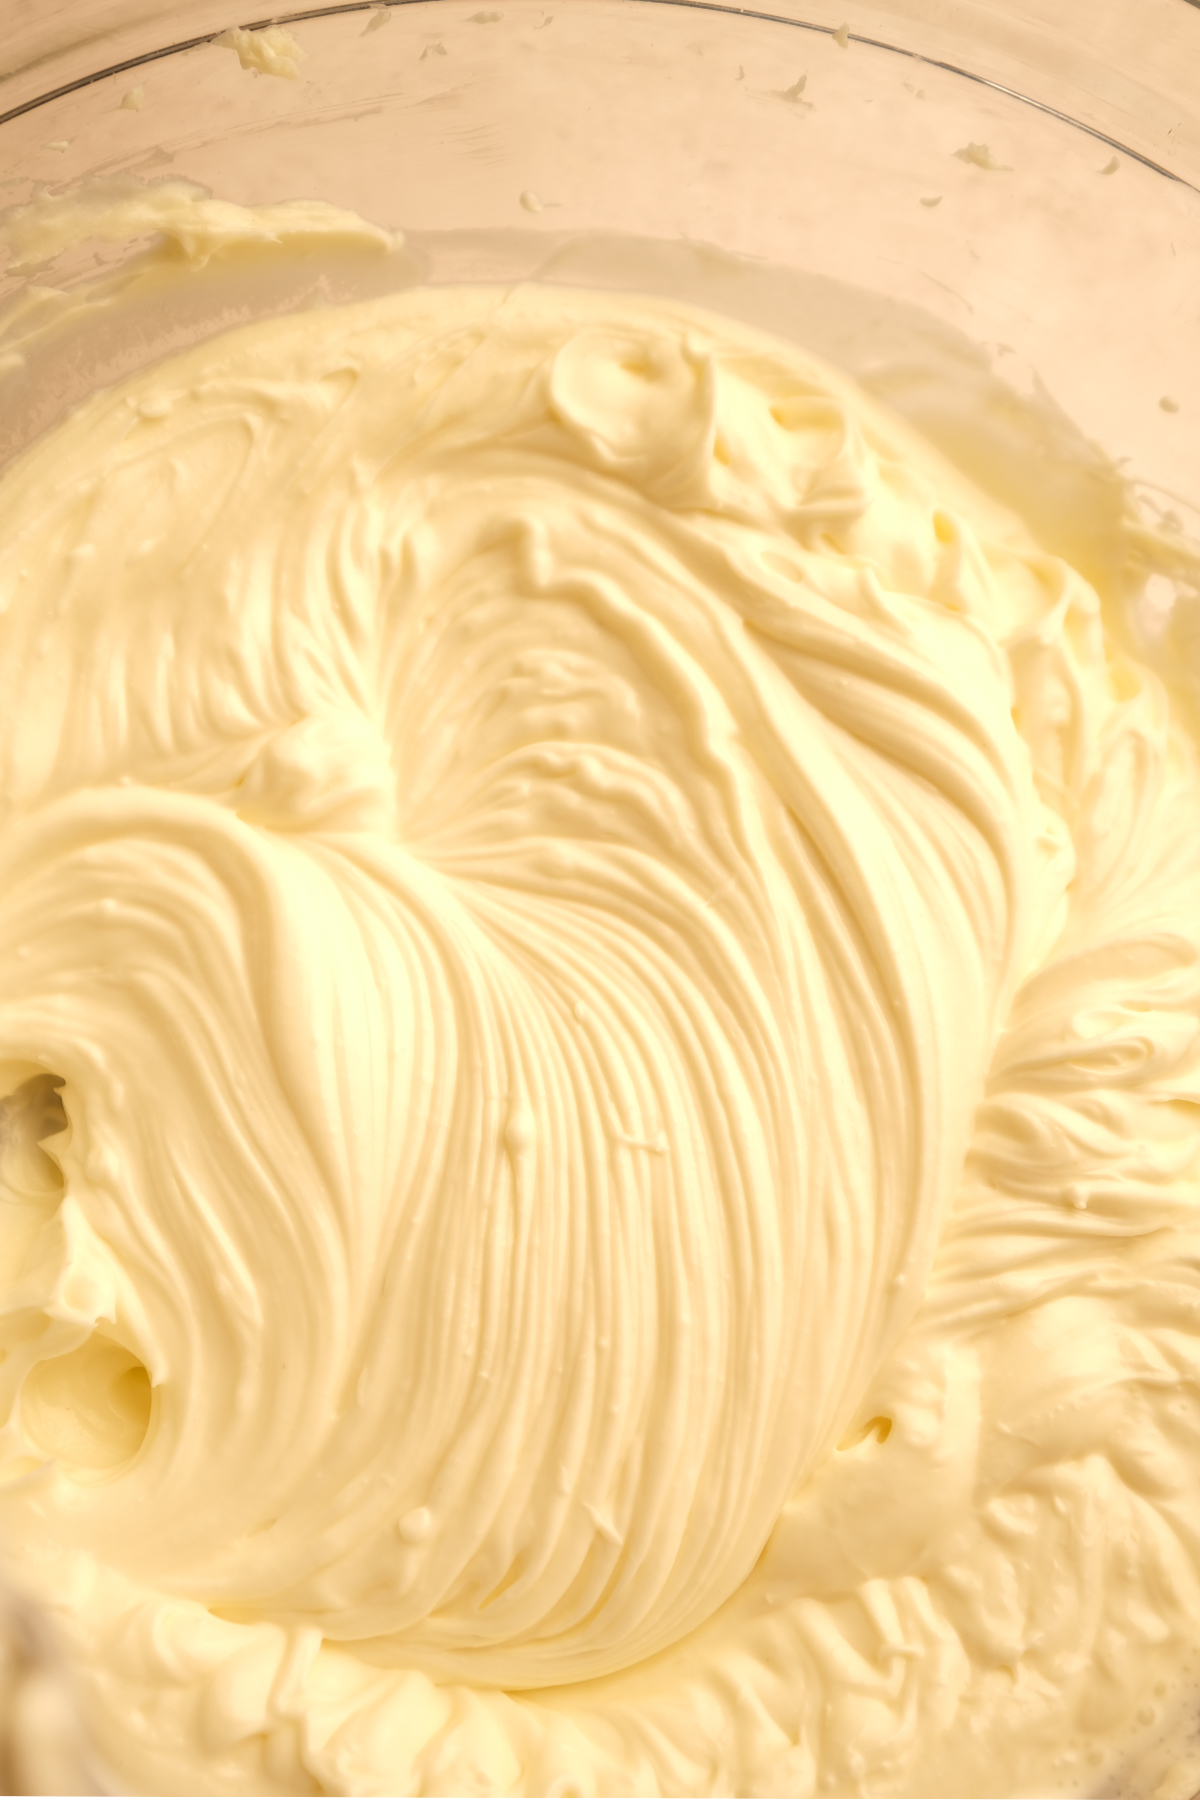
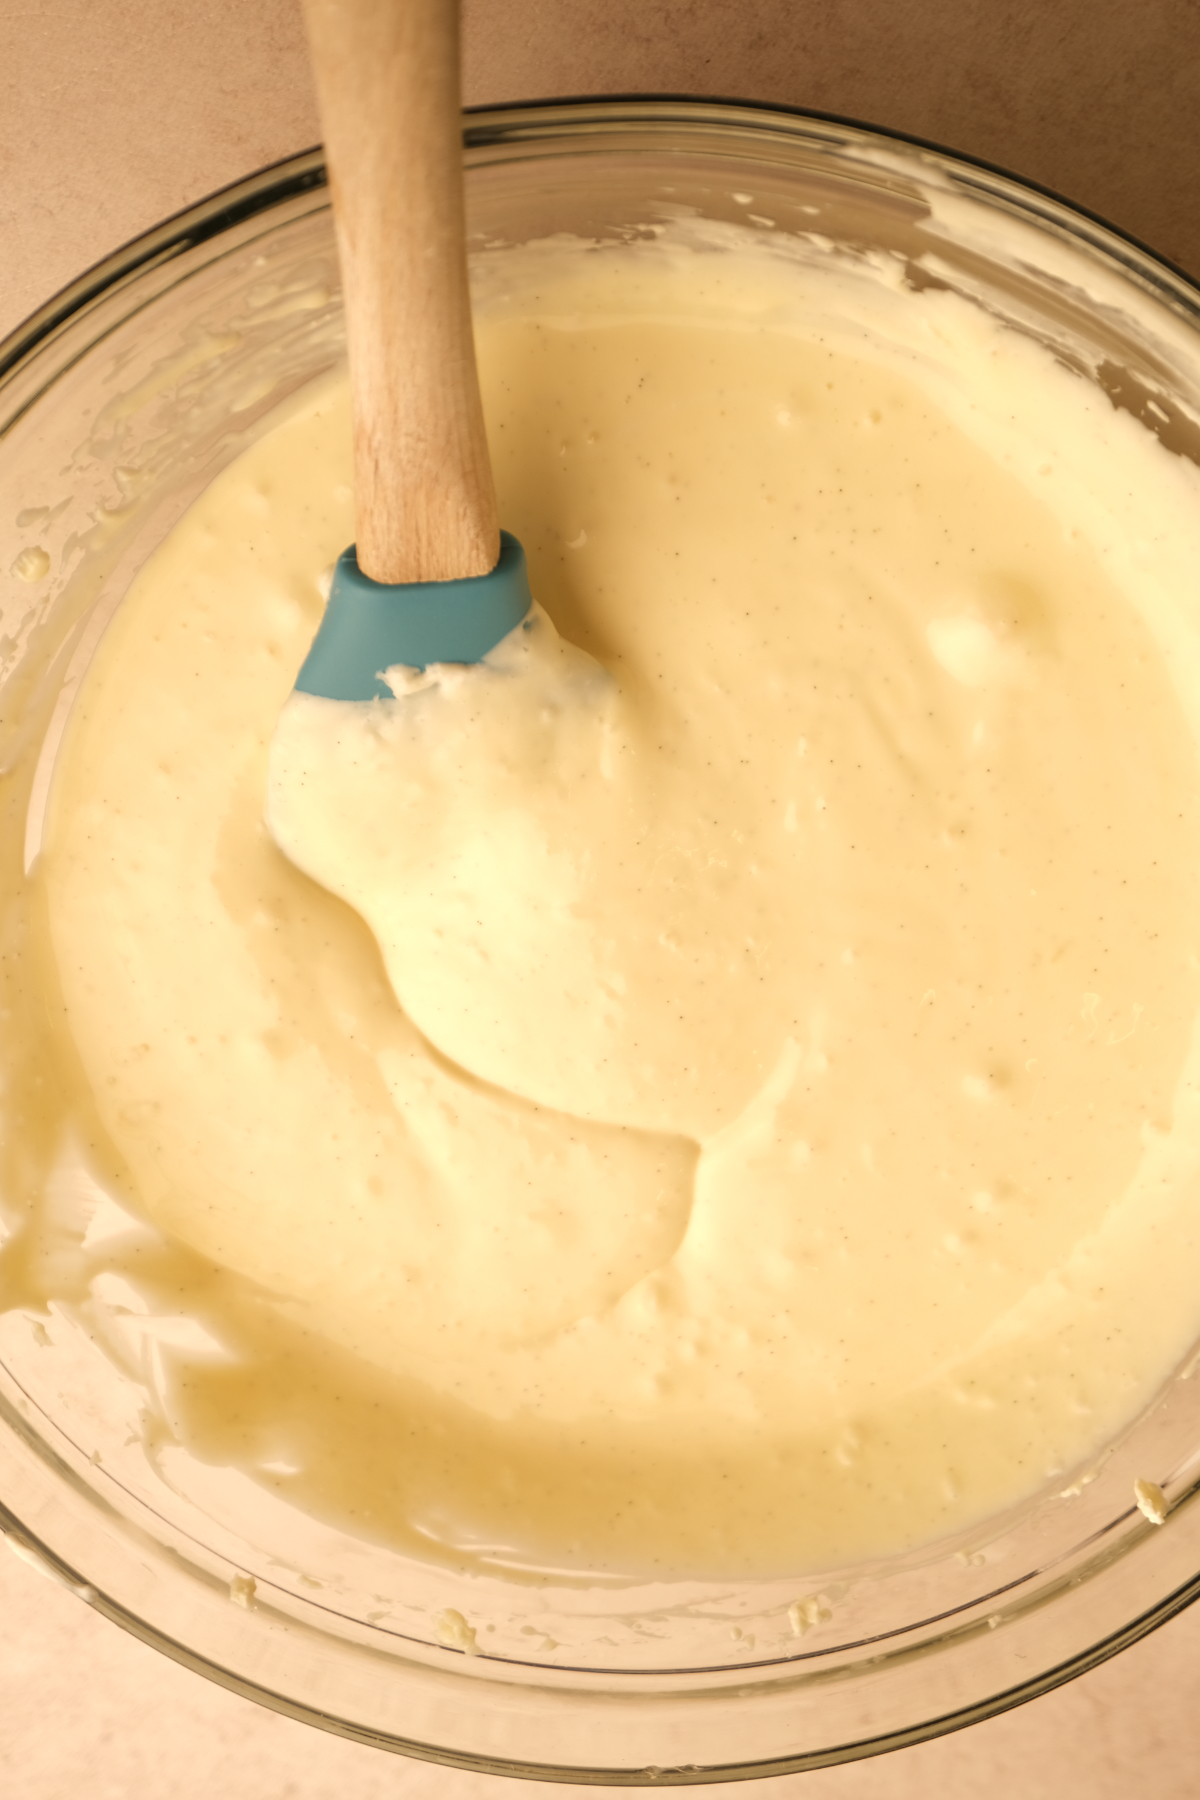
While your sweet potato pie layer is baking, prepare your cheesecake batter.
Before you start, make sure your cream cheese, eggs, and sour cream are at room temperature. This is one of the easiest ways to prevent lumps in your cheesecake!
In the bowl of a stand mixer fitted with the paddle attachment, add the softened cream cheese and granulated sugar.
Mix on medium-low speed until the cream cheese is smooth and creamy. Stop the mixer and scrape down the sides and bottom of the bowl using a rubber spatula. You want to make sure there aren't any pieces of unmixed cream cheese hiding at the bottom.
Once your cream cheese mixture is completely smooth, add the sour cream and heavy cream. Mix on low speed until everything is incorporated. Scrape the bowl again as needed.
In a separate small bowl, whisk together the eggs and vanilla extract.
With the mixer running on low speed, slowly pour the egg mixture into the cheesecake batter. Continue mixing just until everything is combined.
Do not overmix your cheesecake batter! Once the eggs have been added, you want to avoid incorporating too much air. Overmixing can cause your cheesecake to rise too much in the oven and crack as it cools. A tip I learned from one of the bakeries I used to work at is after the last egg is added count 30 seconds and then turn off your stand mixer.
Your finished cheesecake batter should be smooth, creamy, and free of lumps. If you do have a lot of clumps, you can also push the cheesecake batter through a strainer.
Step 4: Add the Cheesecake Layer and Bake
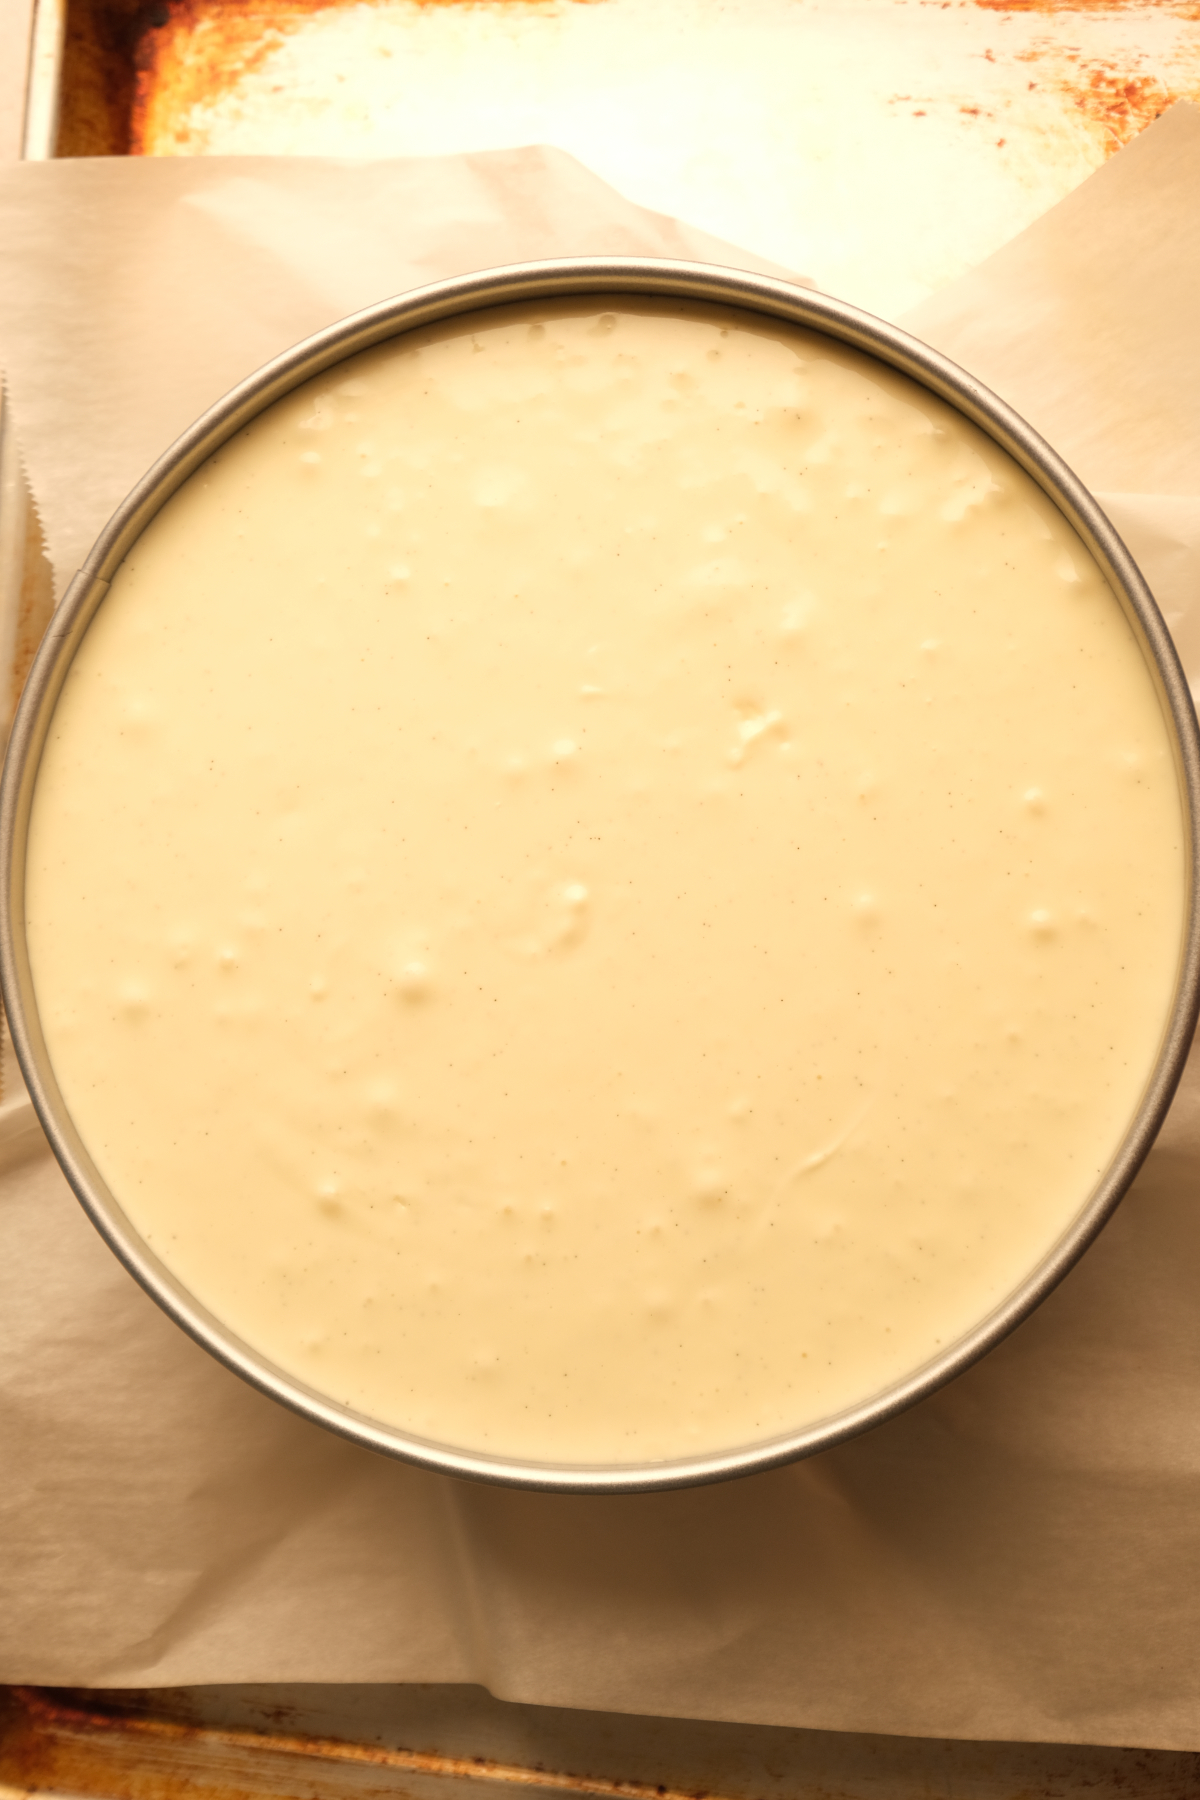
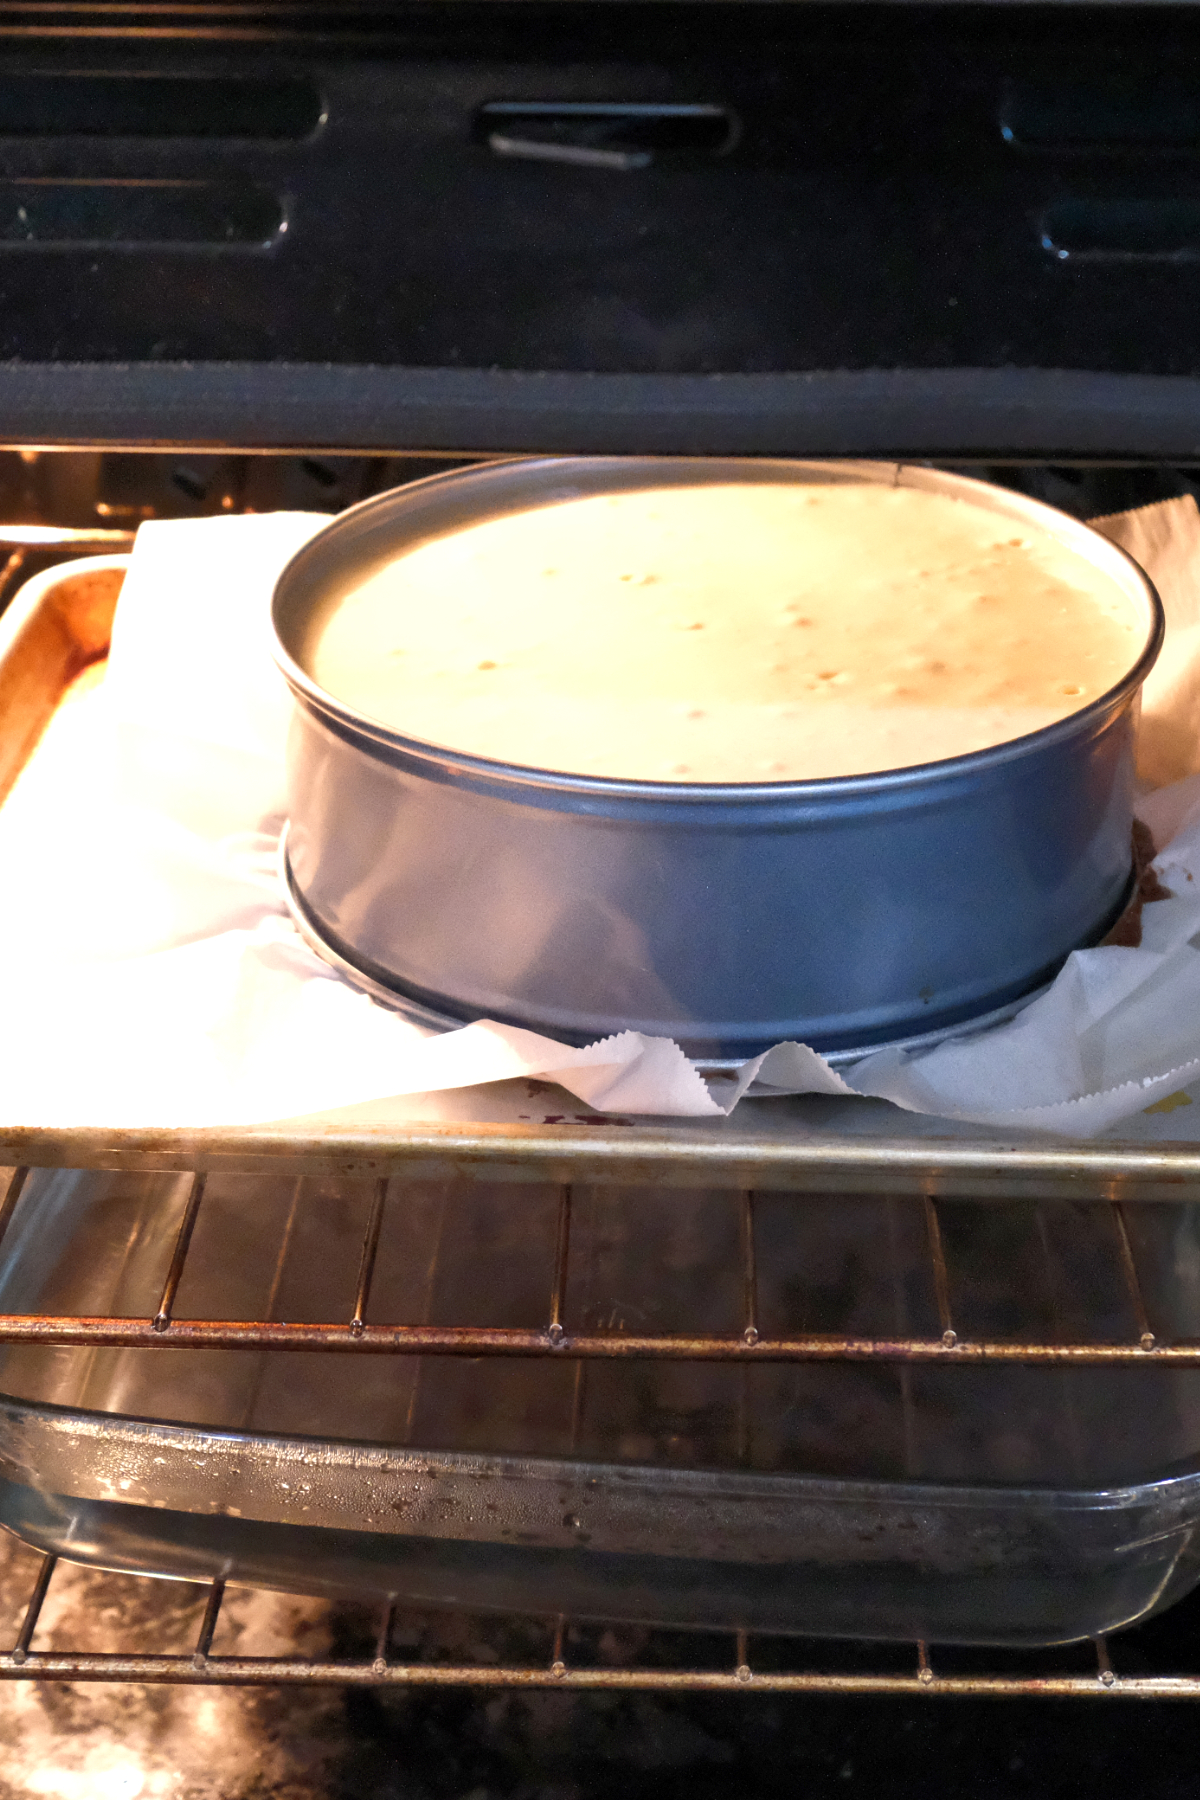
Once the sweet potato pie layer is almost completely baked, carefully remove it from the oven.
Reduce your oven temperature to 300°F.
Gently pour the cheesecake batter over the sweet potato pie layer. I recommend pouring slowly over the back of a large spoon to avoid disturbing the sweet potato filling underneath.
For this recipe, I don't use a traditional water bath where the cheesecake pan sits directly inside a pan of water.
Instead, place a separate 9x13-inch or 8x8-inch baking pan on the rack below your cheesecake and carefully fill it with hot water.
The water creates steam inside the oven and helps keep the baking environment moist. This can help prevent the surface from drying out, although it doesn't provide quite the same temperature control as a traditional water bath.
Bake the cheesecake at 300°F for approximately 30–40 minutes, checking for doneness and adding additional time if needed.
Remember, you're looking for a wiggle, not a jiggle!
When you gently move the cheesecake pan, the center should have a slight, controlled wiggle while the outside edges look completely set.
You don't want the middle to look wet, liquid, or move like it's sloshing around. The cheesecake will continue setting as it cools.
Step 5: Cool the Cheesecake Slowly
Once your cheesecake is done baking, turn off the oven and slightly crack the oven door open.
Leave the cheesecake inside the turned-off oven for approximately 1 hour.
This gradual cooling process helps prevent sudden temperature changes that can cause the cheesecake to crack.
After an hour, remove the cheesecake from the oven and allow it to finish cooling at room temperature.
Once cooled, cover the cheesecake and refrigerate it overnight.
Do not skip the overnight chill! Your cheesecake needs time in the refrigerator to fully set, firm up, and develop that creamy cheesecake texture. I recommend chilling it for at least 8 hours, preferably overnight.
Step 6: Make the Maple Whipped Cream
You can prepare your maple whipped cream the day you bake the cheesecake or make it the following day before serving.
In the bowl of a stand mixer fitted with the whisk attachment, combine the cold heavy whipping cream, pure maple syrup, and vanilla bean paste.
Whip on medium-high speed until soft to medium peaks form.
You want the whipped cream to hold its shape while still looking light, fluffy, and creamy.
Be careful not to overwhip, or the cream can become grainy.
If you're making the whipped cream ahead of time, store it in an airtight container in the refrigerator. Give it a gentle whisk before using if it has softened.
Step 7: Remove the Cheesecake From the Pan and Decorate
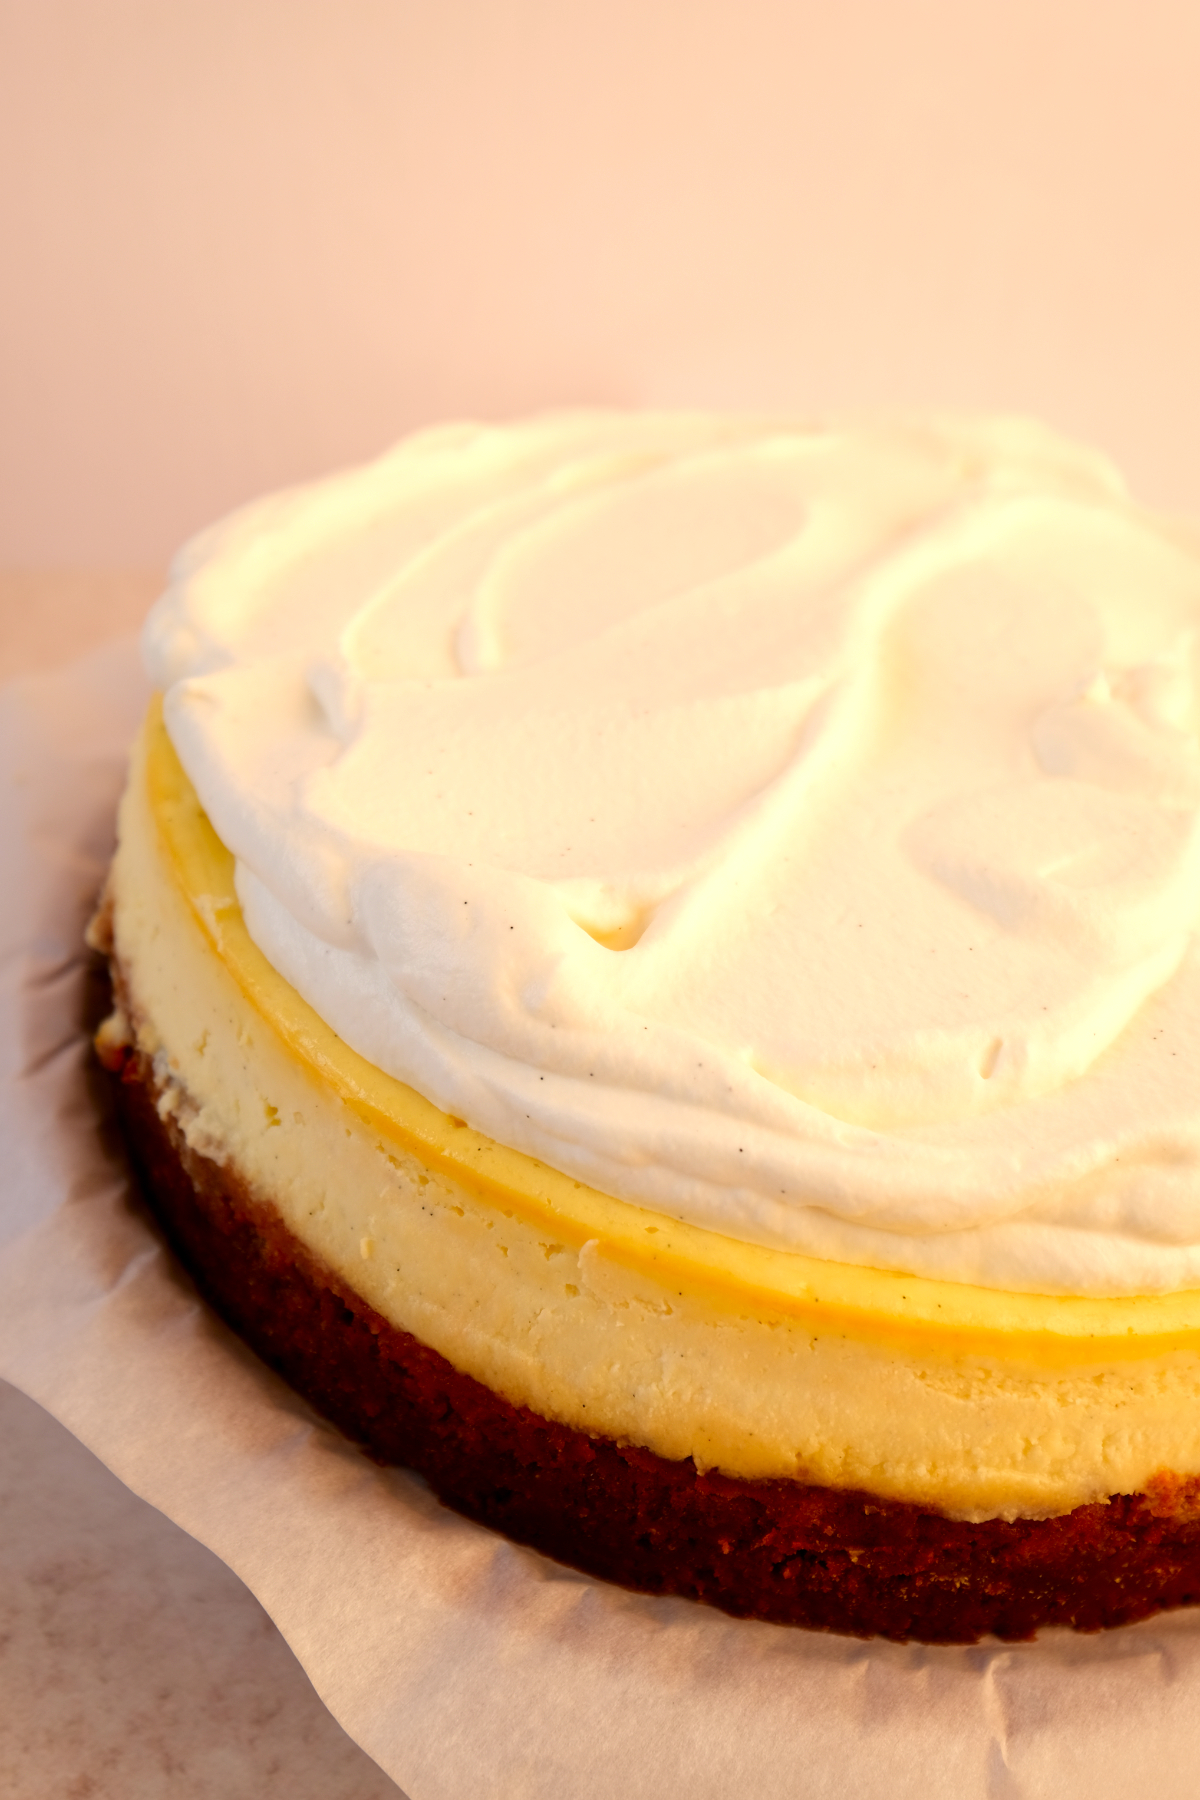
The following morning, once your cheesecake has completely chilled, it's time to remove it from the pan.
Fill a tall glass with hot water and dip a thin butter knife or offset spatula into the water. Wipe the blade dry, then carefully run it around the inside edges of the cheesecake to loosen it from the pan.
Unclasp the latch on your spring form pan and gently lift the outer ring straight up to release the cheesecake.
You can carefully transfer the cheesecake onto a cake board or serving platter using a large offset spatula. If you're worried about breaking the crust, you can leave the cheesecake on the spring form pan base and place it directly onto your serving platter.
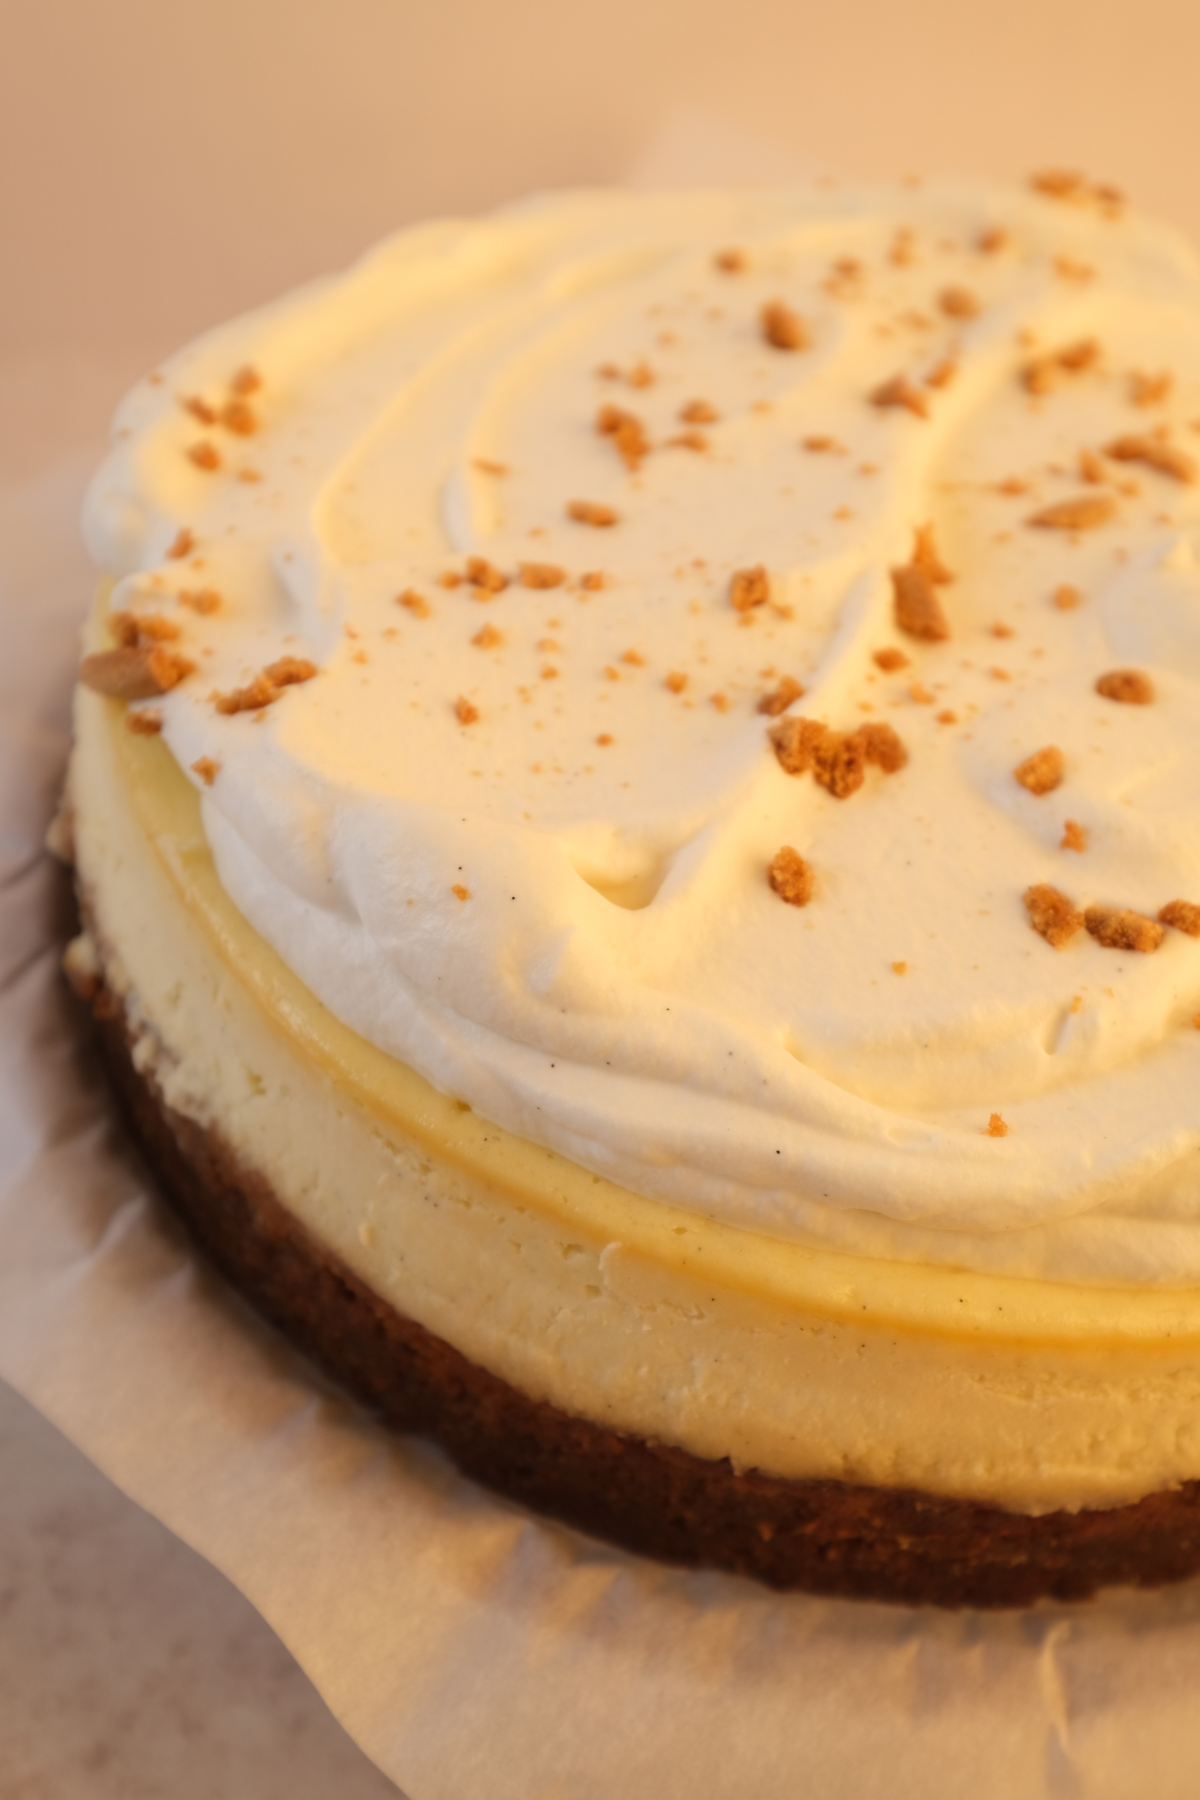
Once the cheesecake is plated, dollop the maple whipped cream over the top and gently spread it around using an offset spatula.
Finish with crushed gingersnap cookies sprinkled over the whipped cream for a little extra crunch.
Slice, serve, and enjoy!
My Tips for the Best Sweet Potato Pie Cheesecake
Make sure the sweet potato pie layer is almost completely set.
This is probably my biggest tip for this recipe! Cheesecake batter is thick and heavy. If you pour it over sweet potato filling that hasn't set enough, the cheesecake can sink into the sweet potato layer. Bake your sweet potato filling until it's almost completely firm before adding the cheesecake.
Always place a baking sheet underneath your gingersnap crust.
Spring form pans aren't always completely leak proof. As the butter in your cookie crust melts, some can escape through the bottom. A baking sheet catches any dripping butter and prevents a mess.
Skip the traditional water bath if you'd like.
You don't have to worry about wrapping your spring form pan in foil and accidentally getting water into your cheesecake crust. Instead, place a separate baking pan filled with hot water on the rack underneath your cheesecake. The steam helps create a moist baking environment.
Scrape the bottom and sides of your mixing bowl.
Don't skip this step! Even when your cheesecake batter looks smooth, there can still be pieces of cream cheese stuck to the bottom of the bowl. Scrape thoroughly before adding your eggs.
Don't overmix once the eggs are added.
Mix your cream cheese until smooth before adding the eggs. Once the eggs go in, keep your mixer on low and mix just until incorporated. Too much air in the batter can contribute to cracks.
How to Store Sweet Potato Pie Cheesecake
Refrigerator: Store leftover cheesecake in an airtight container in the refrigerator for up to 4 days. You can also cover the spring form pan tightly with plastic wrap if you haven't removed the cheesecake yet.
Freezer: You can freeze this cheesecake without the maple whipped cream. Wrap the fully chilled cheesecake tightly in plastic wrap, followed by aluminum foil, and freeze for up to 2 months. Thaw overnight in the refrigerator before decorating and serving.
Make Ahead: This cheesecake is the perfect make-ahead dessert because it needs to chill overnight anyway! I recommend baking the cheesecake one day ahead and adding the maple whipped cream and crushed gingersnaps on the day you plan to serve it.
Frequently Asked Questions
Can I make this sweet potato pie cheesecake ahead of time?
Absolutely! In fact, I highly recommend it. This cheesecake needs to chill overnight, so it's a great dessert to prepare a day or two before Thanksgiving or Christmas. Wait to add the maple whipped cream and crushed cookies until you're ready to serve.
Why does my sweet potato filling need to bake before adding the cheesecake?
The cheesecake batter is much heavier than the sweet potato pie filling. If the sweet potato filling is still too soft, the cheesecake batter can sink into it and the two layers may mix together. Baking the sweet potato layer until almost set helps keep the layers separated.
Do I have to use a water bath?
No! For this recipe, I place a separate pan of hot water on the lower oven rack instead of putting the spring form pan directly into a water bath. It creates steam and keeps the oven environment moist, but it's not identical to a traditional water bath.
How do I know when my cheesecake is done baking?
Look for edges that are completely set and a center with a slight, gentle wiggle when you move the pan. The middle shouldn't look liquid or loose. The cheesecake will continue to firm up as it cools and chills overnight.
Why did my cheesecake crack?
Cheesecakes can crack from overmixing the batter, overbaking, or cooling too quickly. Make sure your ingredients are at room temperature, mix gently once the eggs are added, and allow the cheesecake to cool slowly in the oven.
And if your cheesecake does crack, don't worry! The maple whipped cream will cover the top.
Can I use store-bought sweet potato puree?
Yes, as long as you're using plain, unsweetened sweet potato puree. Avoid sweet potato pie filling because it already contains added sugar and other ingredients. If your puree is watery, the sweet potato layer may need additional baking time.
Can I make the maple whipped cream the night before?
Yes! Store the whipped cream in an airtight container in the refrigerator. However, for the fluffiest texture and best presentation, I recommend making it fresh on the day you serve your cheesecake.
More Thanksgiving Recipes to Try!
Still trying to figure out what desserts to make for Thanksgiving? Here are a few more recipes you can add to your holiday table! If you love sweet potatoes, give my Sweet Potato Cupcakes a try! Whipped cream cheese frosting and maple candied pecans top the cupcakes.
If you want something a little different, try my Pumpkin Trifle, layered with pumpkin cake, creamy pumpkin mousse, maple whipped cream, and candied pecans. Or, if you're craving something warm and comforting, my Brown Butter Sticky Toffee Pudding is another great option!
And of course, you can't go wrong with a classic Homemade Pumpkin Pie! Whether you're hosting Thanksgiving or bringing a dessert to share, there's a little something for everyone!
Sweet Potato Pie Cheesecake with Gingersnap Crust
Ingredients
Gingersnap Cookie Crust
- 2 cups gingersnap cookies crushed
- 6 tablespoon unsalted butter melted
- 2 tablespoon brown sugar
Sweet Potato Pie Filling
- 2 cups sweet potatoes cooked and mashed
- 1 cup granulated sugar
- 1 teaspoon ground cinnamon
- ½ teaspoon ground ginger
- ¼ teaspoon ground nutmeg
- 1 teaspoon vanilla extract
- ¼ cup unsalted butter melted
- 2 large eggs room temperature
- ¾ cup whole milk
Cheesecake Filling
- 2 8 ounce Philadelphia cream cheese room temperature
- ¾ cup granulated sugar
- ¾ cup sour cream room temperature
- ⅓ cup heavy cream
- 3 large eggs room temperature
- 1 teaspoon vanilla extract
Maple Whipped Cream
- 2 cups heavy whipping cream cold
- 2 tablespoon pure maple syrup
- 1 tablespoon vanilla bean paste optional
Topping
- Crushed gingersnap cookies for garnish
Instructions
Gingersnap Cookie Crust
- Preheat the oven to 350°F. Combine the crushed gingersnap cookies, melted butter, and brown sugar in a medium bowl until evenly moistened.
- Press the cookie mixture firmly into the bottom of a 10-inch springform pan. Place the pan on a baking sheet to catch any leaking butter.
- Bake at 350°F for 10 minutes. Remove from the oven and set aside.
Sweet Potato Pie Filling
- In a large bowl, combine the mashed sweet potatoes, sugar, vanilla extract, melted butter, eggs, and whole milk. Mix until smooth and well combined.
- Pour the sweet potato filling over the baked gingersnap crust and spread evenly.
- Bake at 350°F for approximately 40 minutes, or until the filling is almost completely set. The center should have only slight movement and should no longer look liquid.
Cheesecake Filling
- In a stand mixer fitted with the paddle attachment, beat the room-temperature cream cheese and granulated sugar on medium-low speed until smooth and creamy. Scrape the sides and bottom of the bowl.
- Add the sour cream and heavy cream. Mix on low speed until fully incorporated, scraping the bowl as needed.
- In a separate bowl, whisk together the eggs and vanilla extract. With the mixer running on low, slowly add the egg mixture to the cheesecake batter. Mix just until combined, being careful not to overmix.
Assemble and Bake
- Once the sweet potato filling is almost completely set, remove it from the oven and reduce the oven temperature to 300°F.
- Gently pour the cheesecake batter over the sweet potato layer, spreading carefully into an even layer.
- Place a separate 9x13-inch or 8x8-inch baking pan filled with hot water on the lower oven rack, underneath the cheesecake.
- Bake at 300°F for approximately 30–40 minutes, or longer if necessary, until the edges are set and the center has a slight, controlled wiggle.
- Turn off the oven and slightly open the oven door. Allow the cheesecake to cool inside the oven for 1 hour.
- Remove the cheesecake from the oven and allow it to cool completely at room temperature. Cover and refrigerate overnight for at least 8 hours.
Maple Whipped Cream
- In a stand mixer fitted with the whisk attachment, combine the cold heavy whipping cream, maple syrup, and optional vanilla bean paste.
- Whip on medium-high speed until soft to medium peaks form. Refrigerate until ready to use.
Decorate and Serve
- Dip a thin butter knife or offset spatula into hot water, wipe dry, and carefully run it around the inside edges of the chilled cheesecake.
- Release the latch on the springform pan and gently lift off the outer ring. Transfer the cheesecake onto a serving platter or cake board, or leave it on the springform base.
- Dollop the maple whipped cream over the cheesecake and spread evenly.
- Sprinkle additional crushed gingersnap cookies over the top. Slice and enjoy!
Notes
- Sweet Potato Layer: Bake until almost completely set before adding the cheesecake batter to prevent the layers from sinking into each other.
- Cream Cheese: Use softened, full-fat Philadelphia cream cheese for a smooth and creamy filling.
- Water Pan: A separate pan of hot water on the lower oven rack creates steam without placing the cheesecake crust directly into water.
- Doneness: The cheesecake should have a slight wiggle in the center, not a loose or liquid jiggle. Baking time may vary by oven.
- Overnight Chill: Refrigerate for at least 8 hours before removing from the pan and slicing.
- Storage: Keep refrigerated for up to 4 days. For best results, decorate with the whipped cream and gingersnap crumbs shortly before serving.


